
Laptop Sleeve Sewing Tutorial
- Jan 29, 2023
- 6 min read
Updated: Jan 21, 2024
Today we are going to make a laptop sleeve. This sleeve uses foam to provide padding to help keep your laptop safe. With an adjustable shoulder strap and handles this sleeve is easy to take on the go. This sleeve can easily be made to accommodate any size laptop or even a tablet.


This is a version I previously made using all quilting cotton. I pieced together the main body and the lining for contrast. I made my strap using quilt cotton explained in the alternate strap options below.


I also made a matching tablet sleeve but left off the straps and handles.

You want to start by measuring your laptop. Then you want to add to the measurements to accommodate the thickness of the computer and allow the computer to easily fit through the zipper. Adding more to the width is going to help with the zipper closure, where as you don’t need as much extra in the height. I added 3” to the height and 5” to the width.


I took my measurements in comparison to a previously made laptop sleeve. This laptop sleeve was made for a larger computer.
Materials
This can be made from a variety of materials: quilting cotton, vinyl or faux leather, cork, or canvas. Materials like quilting cotton or thin canvas should be interfaced for stability. For my sleeve I am using quilting cotton and faux leather for the exterior, quilting cotton for the lining, and faux leather for the strap.
Supplies
½ yard quilting cotton for exterior
¼ yard faux leather for accent and straps
¾ yard quilting cotton for lining
½ sew in foam (I use Bosal In-R-Form)
1 yard fusible woven interfacing (only need for quilt cotton or thin canvas)
2- 1” d-rings
2- 1” swivel hooks
1- 1” slider buckle
20” zipper (I used zipper tape by the yard)
Label (optional)

I used a triangle ring because I prefer these with the swivel hooks.
Alternate Strap Options
Faux leather or vinyl work great for straps as they are sturdy and look professional. These straps can be sewn multiple ways. Here are some alternatives to the tutorial.
Strap webbing can be used as is, just match the width to the hardware. Attach hardware same as below.
Quilting cotton can be used also. First cut the pieces double the hardware width plus seam allowance (3” for this project), Sew 2 pieces together to get the 50” length. Interface the whole strap. Fold Strap in half right sides together and sew long side together. Flip strap out and press well. Attach hardware in the same steps as below, but tuck the raw edges in when sewing for a clean finish.
Pieces:
Main Exterior- Quilt Cotton
2 pieces- 8.5” X 19”- main body*
2 pieces- 3” X 11.5”- handles (optional)
Accent- Faux Leather
2 pieces- 4.5” X 19”- main body accent*
1 piece- 50” X 2” strap (You may need to cut 2 pieces and seam together to get 50”) (see alternate strap options above)
1 piece- 6” X 2”- strap connectors
*If using only one fabric for your main body panel cut 2 pieces- 12” X 19” and skip step 5.
Lining- Quilt Cotton
2 pieces- 12” X 19”- lining body
1 piece- 11” X 11”- slip pocket (optional)
Interfacing- Only needed for pieces cut from quilting cotton
2 pieces- 12” X 19”- lining body
2 pieces- 9” X 19”- main body
2 pieces- 10” X 2”- handles
Foam
2 pieces- 12” X 19”- main body

Assembly
1. Cut all pieces.
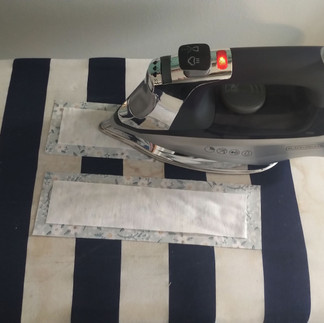
2. Apply interfacing to quilt cotton pieces, lining body pieces, main body pieces, and handles. The interfacing for the handles is smaller than the fabric, center the interfacing in the middle of the fabric to reduce bulk in the seam allowances.


Prepare lining
3. Pocket. Fold pocket in half right sides together. Sew the 3 open sides leaving an opening in the bottom for turning with a 1/2” seam allowance. Clip corners and turn right side out. Poke out corners using a turning tool, mechanical pencil*, or chopstick. Press, make sure the opening is turned in to be flush with the rest of the seam.
*Use a mechanical pencil with no lead as a turning tool. It pokes out the corners well but is not sharp enough to poke through.


4. Place pocket in the middle of one of the lining panels. This placement can be adjusted for personal preference. Just be careful not to get to close to the top or the pockets are not very functional. Top stitch in place with 1/8” seam allowance making sure to close the whole in the bottom. Set lining pieces aside.

In the pictures you will see and extra zipper pocket, this pocket tutorial can be found here.
Main Body
5. Attach the main body to the main body accent. Lay pieces right side together making sure that directional prints are aimed toward the accent piece. Sew with 1/2” seam allowance. Fold seam allowance toward the main body. Top stitch along the quilting cotton with 1/8” seam allowance. Do this for front and back.

6. Make handles. Fold the handle in half right sides together. Sew along the open sides with a 1/2” seam allowance leaving a gap in the long side for turning.
Trim the corners and flip to the right side. Poke out corners and press.

Top stitch around all sides.

7. Attach handles to main body. I placed my handles 2.25” from the top edge and 1.5” from the center. Top stitch in place. I sewed a little box with an X in the middle for strength.


This is the best time to add the label I centered mine between the handle and the quilting cotton.

8. Attach foam. Attach the foam to the wrong side of the main body. Sew with 1/8” seam allowance to secure them together.


9. Strap connector. Fold the strap connector in half wrong sides together. Top stitch along both sides with 1/8” seam.


Cut this piece in half.

Slide a d-ring through each half and fold.

Stitch together at the bottom end and right next to the d-ring using a zipper foot.

10. Place the strap connector against the main body at the seam of the faux leather or about 4.5” from the top edge, have the d-rings facing the main body. Baste in place.


Attach Zipper
11. Place zipper right sides together with main body, make sure the handle is out of the way. If you prefer you can baste the zipper to the main body with 1/4" seam first.

Lay lining panel right side facing right side of main body panel. Sew through main body, zipper, and lining with a 3/8” seam allowance with a zipper foot.

Pull body and lining away from zipper, the main body and lining should be on one side of the zipper with wrong sides facing.

Top stitch the main body and lining away from the zipper. I sew about 1/4” away from the zipper teeth using my standard foot. This will secure the seam allowances and have everything lay flat since you do not want to iron the faux leather.

Repeat for other side of the zipper, ensuring that the panels align on the sides.


Make sure the lining pocket is facing the zipper.


12. Fold the main body panels right sides together and the lining panels right sides together. Fold the zipper teeth toward the main body panels.


Open the zipper so you can pull the bag through.

Secure around all the sides leaving an opening in the lining bottom to pull though. Sew using a 1/2” seam allowance using care around the zipper so you do not break a needle.

Clip corners and any excess zipper tape.


Reach into bag and pull the main body out through the hole in the lining.

Poke out all corners and the zipper edges.

Match the lining opening together and press.

Top stitch opening closed with 1/8” seam.

Push the lining back into the bag.


Strap
I am going to make the strap with faux leather. Alternative strap options are listed above in the intro.
13. I needed to piece my strap pieces together. Lay the two end right sides together at a 90-degree angle. Draw a line across the strap at a 45-degree angle.

Sew across this line. Trim off the excess.

Top stitch on either side of the seam.

14. Fold the strap in half wrong sides together same as the strap connectors above. Tops stitch down each side of strap about 1/8" from the edge. I used a zigzag stitch for decoration, medium width and a 1.5 mm length.

Attach hardware.
16. First take the slide buckle and wrap the strap around the center bar. Pull the strap through about 1” fold over.

Secure the strap using two rows of stitches.

17. Slide one of the swivel hooks onto the strap making sure that the hook is on the right side of the strap. You can tell the right side because the overlap of your end by the slide is the wrong side.

Feed the strap back through the slide buckle and back around the other side. The slide buckle should now work properly. Make sure the strap is not twisted when you feed it through the buckle.

18. With right side of strap up feed the open strap end through the other swivel hook. Pull through about 1” and fold the strap. Secure the end with two rows of stitching.

Now clip the swivel hooks to the d-rings.

Slide your laptop in and enjoy your new bag!


Great tutorial and great laptop sleeve!